7.
Compress the long roll
to make a shorter,
fat roll. |
 |
If you had made a millefieri cane and
reduced it you would probably not want
to try to scale it back up by squashing it
into a larger roll. But when making fire,
some deformation is desirable... but not
too much or it will look more swirled and
less like fire. |
8.
Compress shorter,
fat roll into
a rectangular
solid. |
|
It doesn't need to be a cube, but it should
be a block with more or less vertical sides
and a flat top and bottom. |
9.
Look carefully
at the block
and determine
which direction
to cut slices
to yield a fire
pattern. |
|
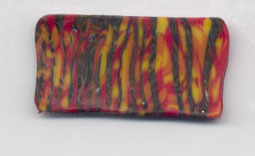
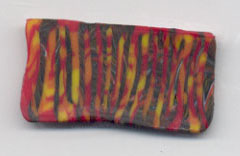
There really is a best direction to slice
the block. In one direction you will
get mostly lines. In another (cutting as
if it were a millefiori cane) you'll get
some variation, but it won't look like
fire as much as the third direction.
The ones below were cut in the wrong direction.
 |
10.
Cut one slice
to clean up the
end and see
whether you've
cut in the right
direction. |
|
The best way to know for sure is to cut a
slice off and see. Each slice will look
different, but you'll know after even one
if you are cutting in the wrong direction. |
11.
Cut additional
slices as needed
for projects. |
|
Either leave it as a solid block or cut thin
slices to use on future projects.
I connect them side to side to make a long
strip of fire. Taller fire sections require
a taller block.
I use sheets of paper to display and store
the small sections of fire. |
Previous |